My new grill gazebo by Backyard Discovery
Posted on Tue, 4 Jul 2023 by KiM
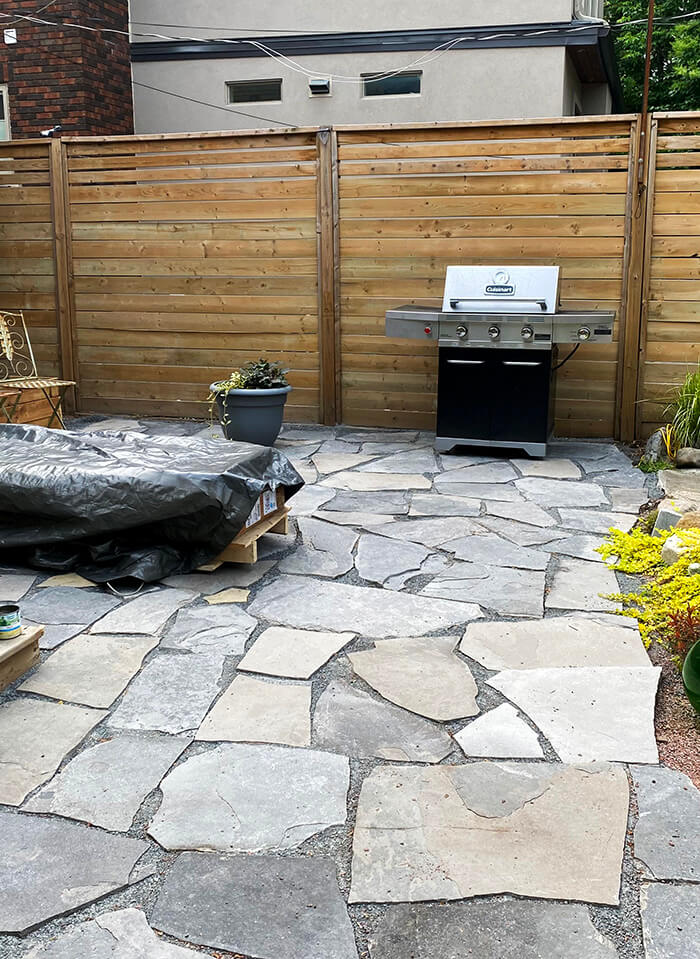
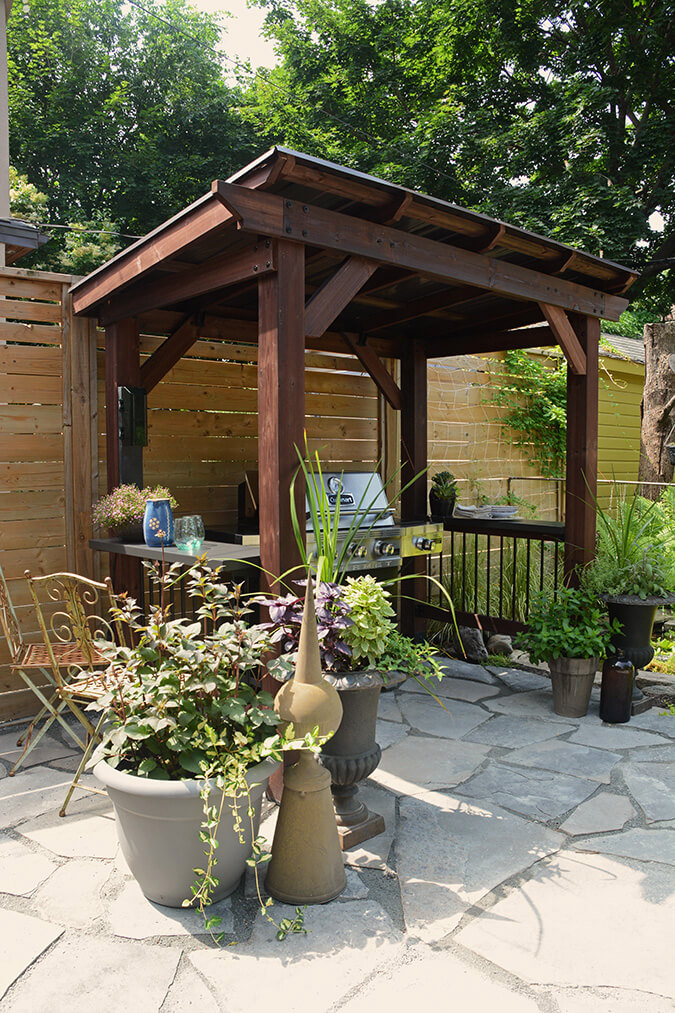
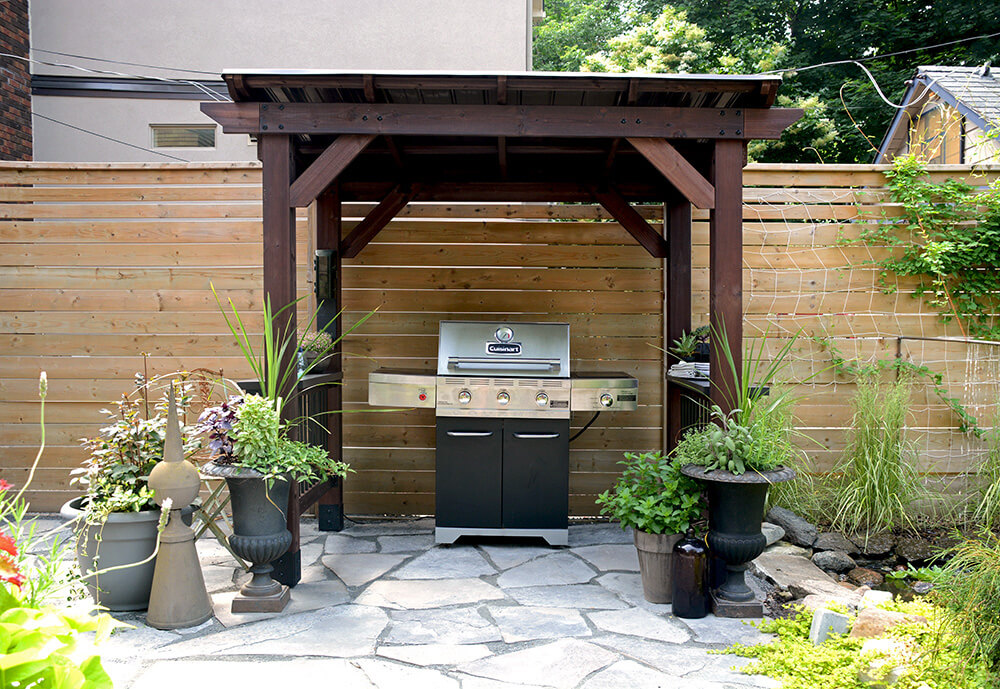
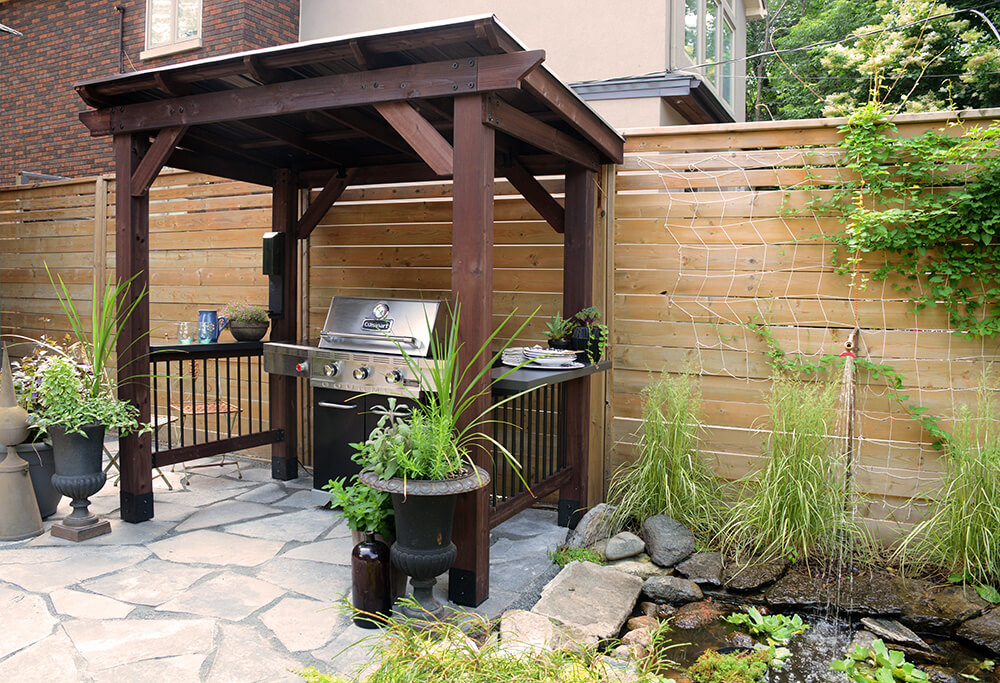
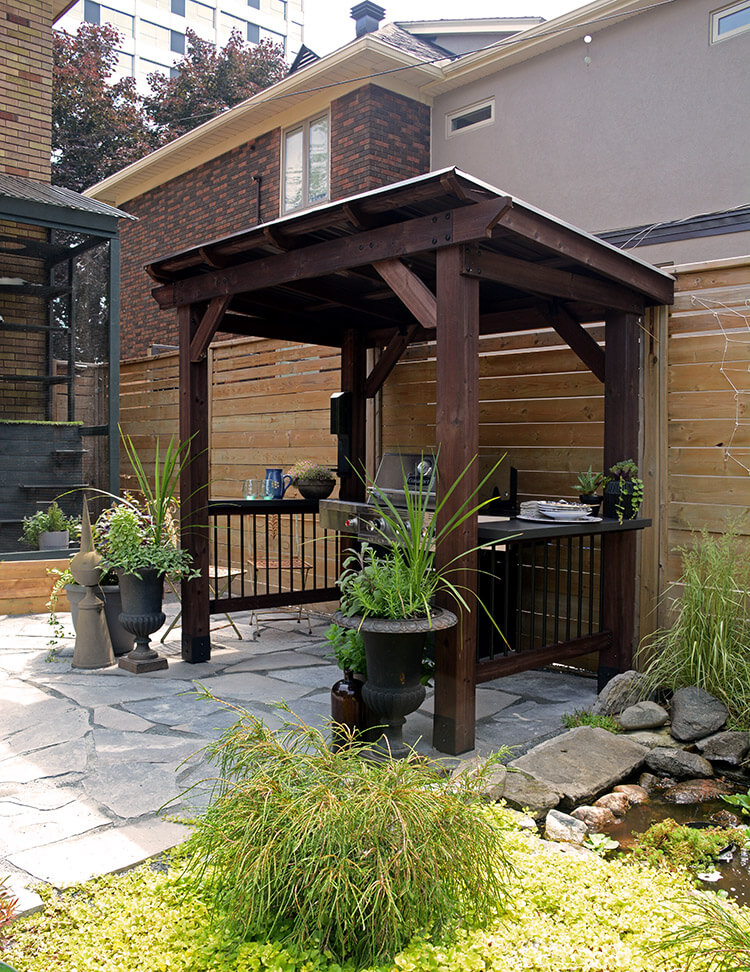
My backyard has gone through some changes over the past few years since we started working on it. One of the things we did recently was remove a tree and a badly designed catio in the corner of our yard and we ended up with this rather large area of essentially unused space. We laid some flagstone we bought for $200 on Facebook Marketplace and decided this would become a barbecue area. My husband was going to design and build a gazebo to put over the barbecue (for some reason he hates cooking in the rain LOL) but to my absolute delight, the folks at Backyard Discovery reached out about the recent launch of their new Canadian site, backyarddiscovery.ca, and offered me one of their products to test out. When I learned that among play structures, pergolas and gazebos, they had actual grill gazebos I could not believe my luck! Not that I didn’t think my husband could build one, but I am 150% sure this went WAY smoother and looks better than what he would have come up.
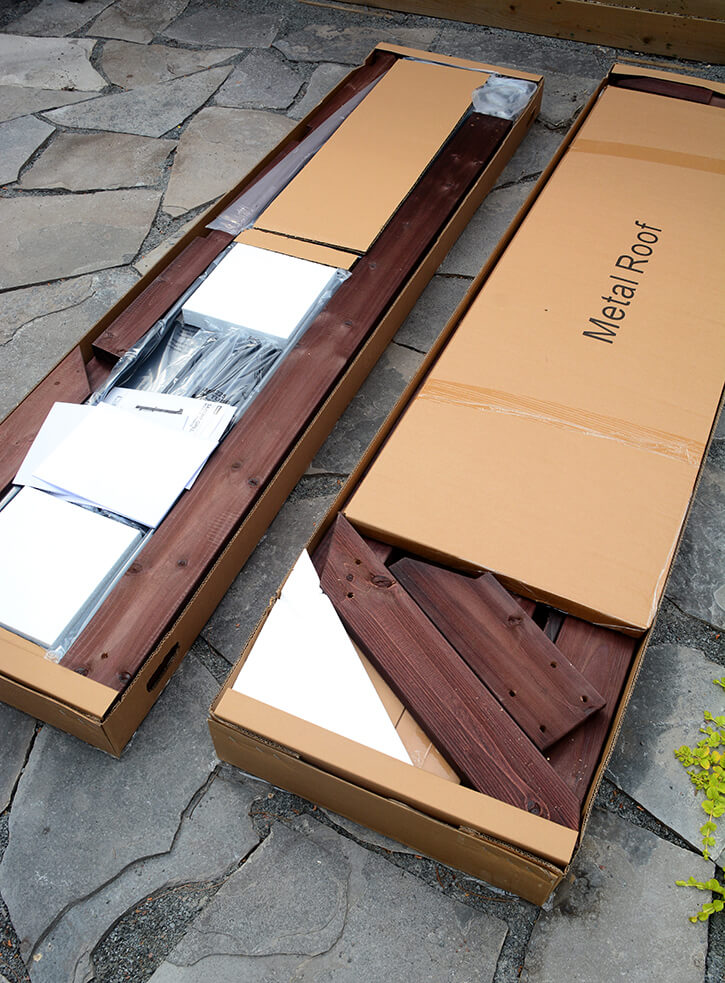
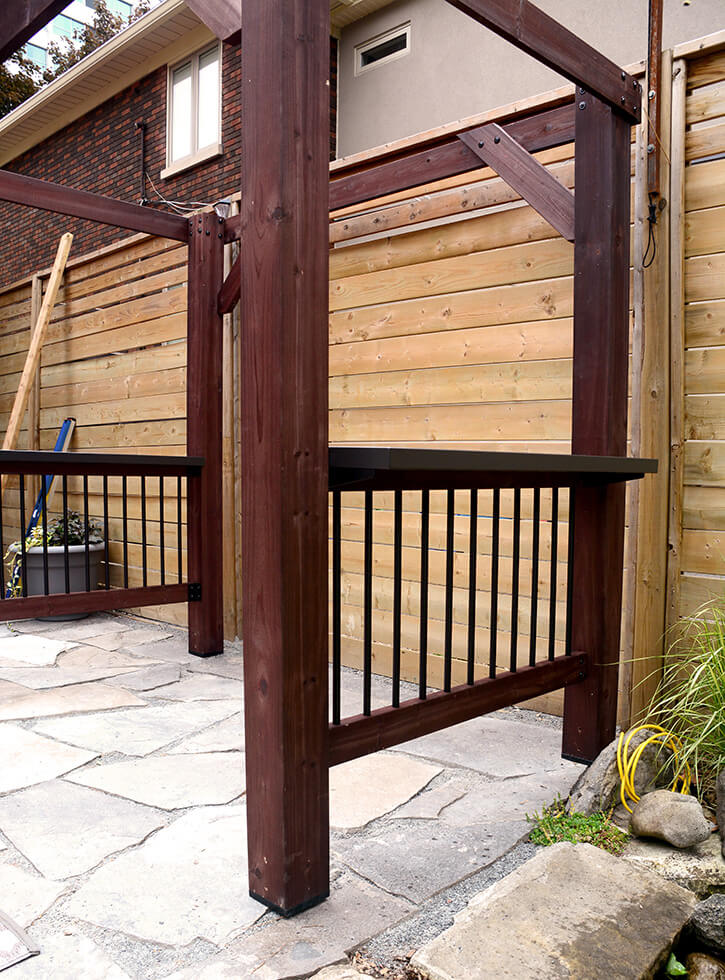
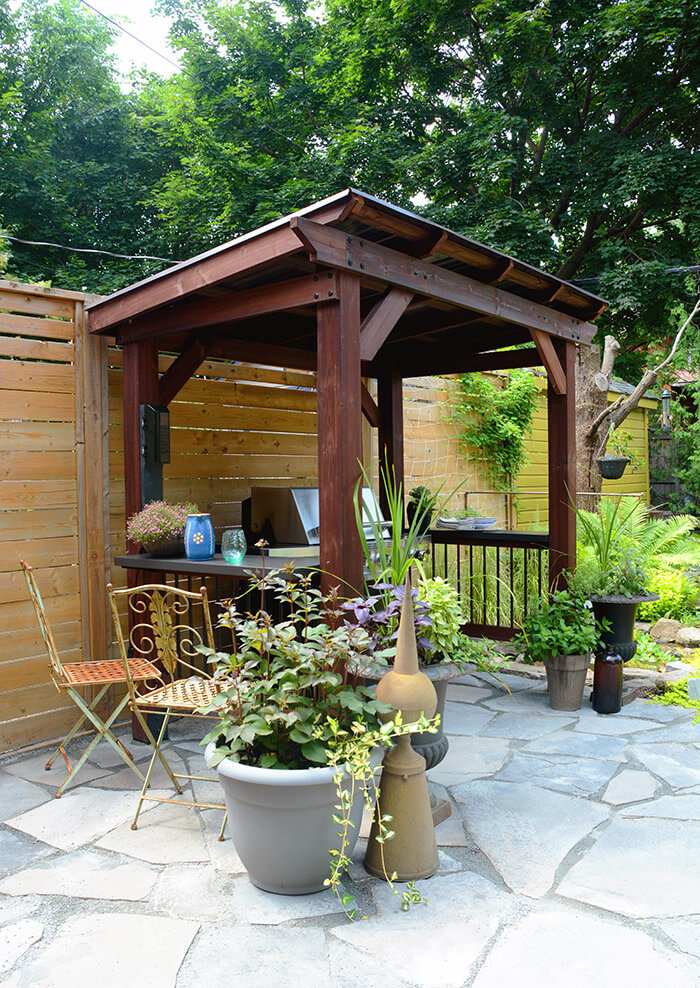
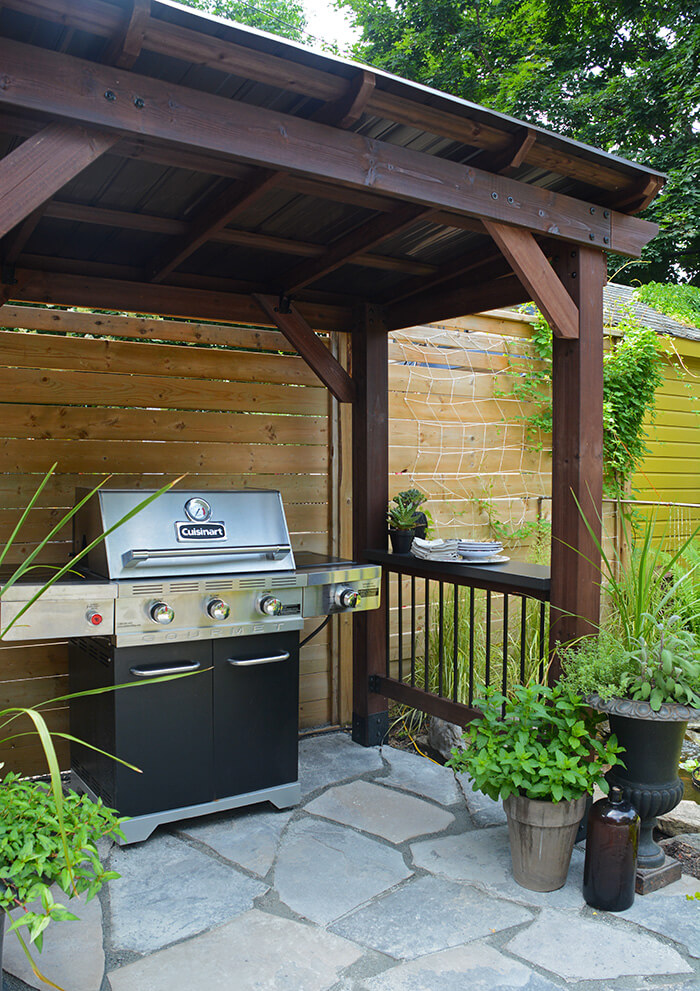
I went with the Saxony grill gazebo, which is perfect for an “average” size barbecue (up to 70″ wide) and really fit the space we had to work with without being too bulky. It comes ready to assemble in pre-stained cedar, with a roof made of steel so it can withstand our Canadian winters and the snow they naturally come with. It requires 2 people to put together so my husband and I tackled it together. He’s got a slew of tools in his workshop so we had everything we needed (and much more) to be able to put it together, but really it just needed the basics (ie. hammer, wrenches, screwdrivers, drills etc).
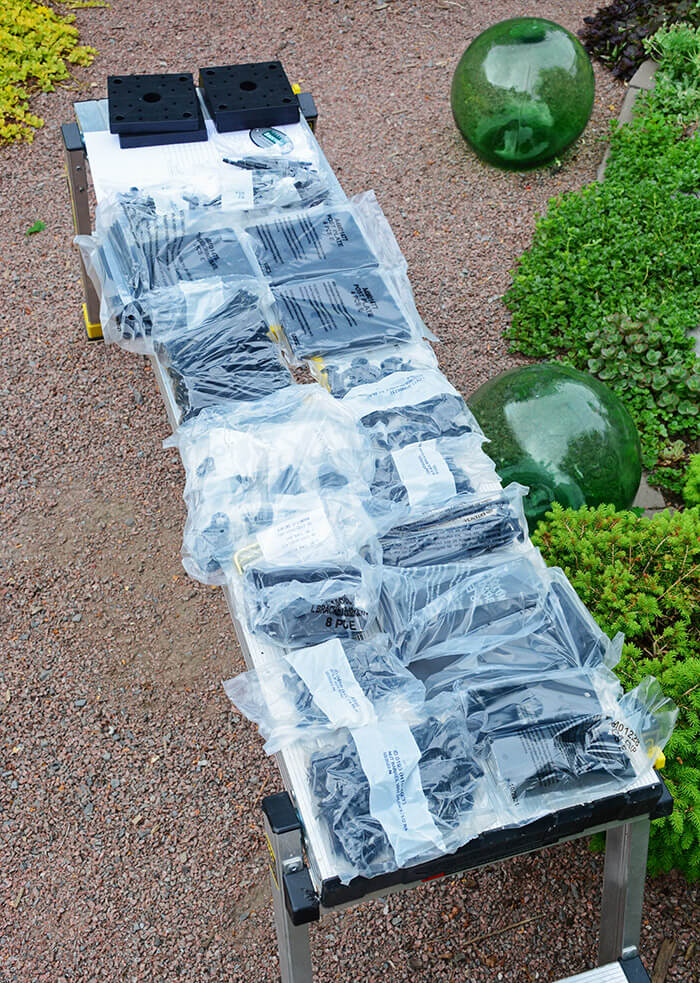
When we unpacked everything I got a little nervous because there were MANY bolts and screws and doodads as per the above photo, and the instructions did say it would take 2 people around 4 hours to put together. Realistically it took a bit longer than that with some sanity breaks thrown in, and went faster as we learned some “tricks” – one important one being that while the holes are pre-drilled, we discovered after stripping a few screws inexplicably that there was a lot of debris from the pre-drilling in the holes so we used a long screw to jam in to all the holes to clear them before drilling.
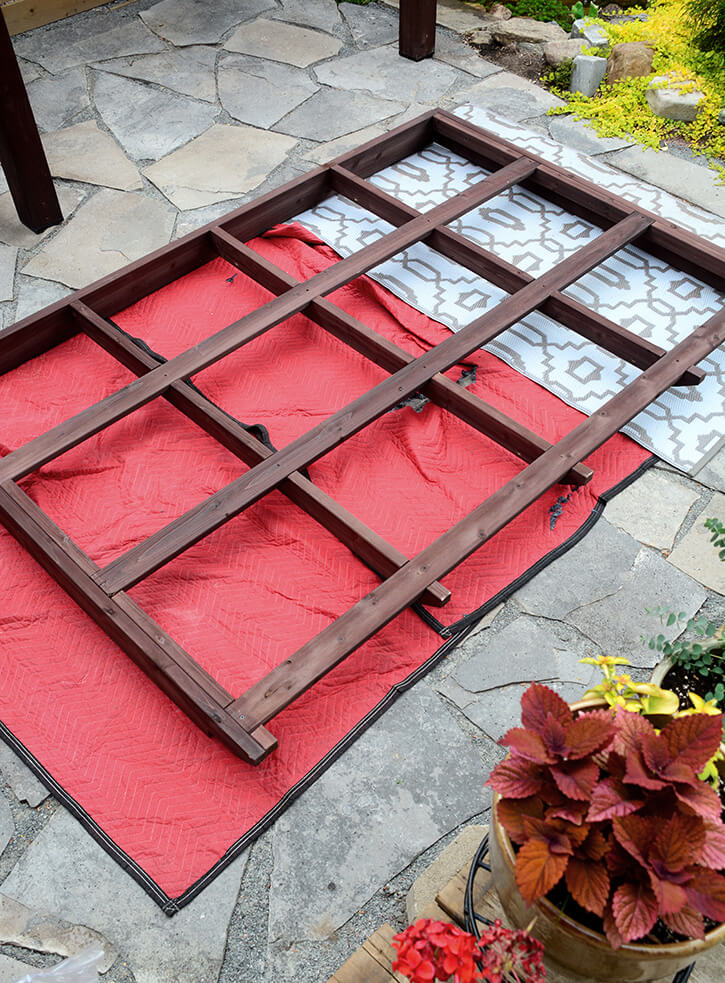
We started with the basic structure:
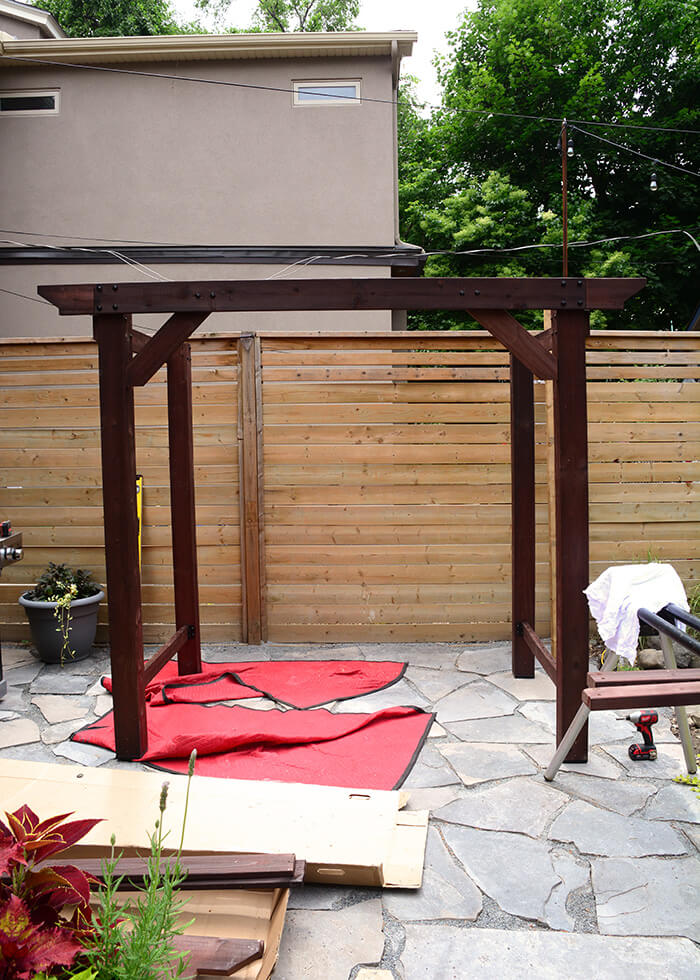
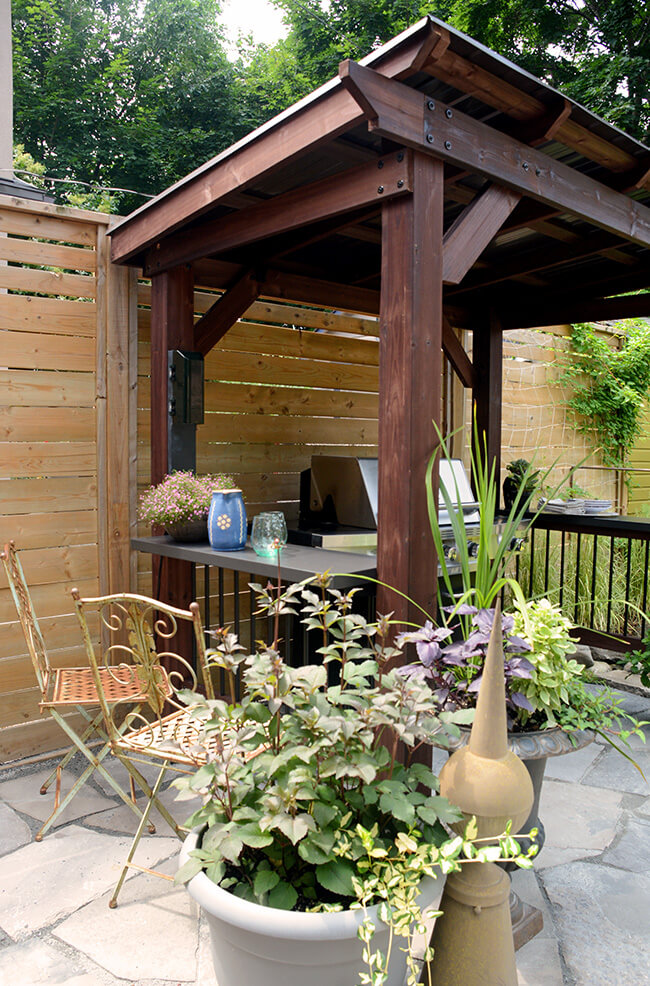
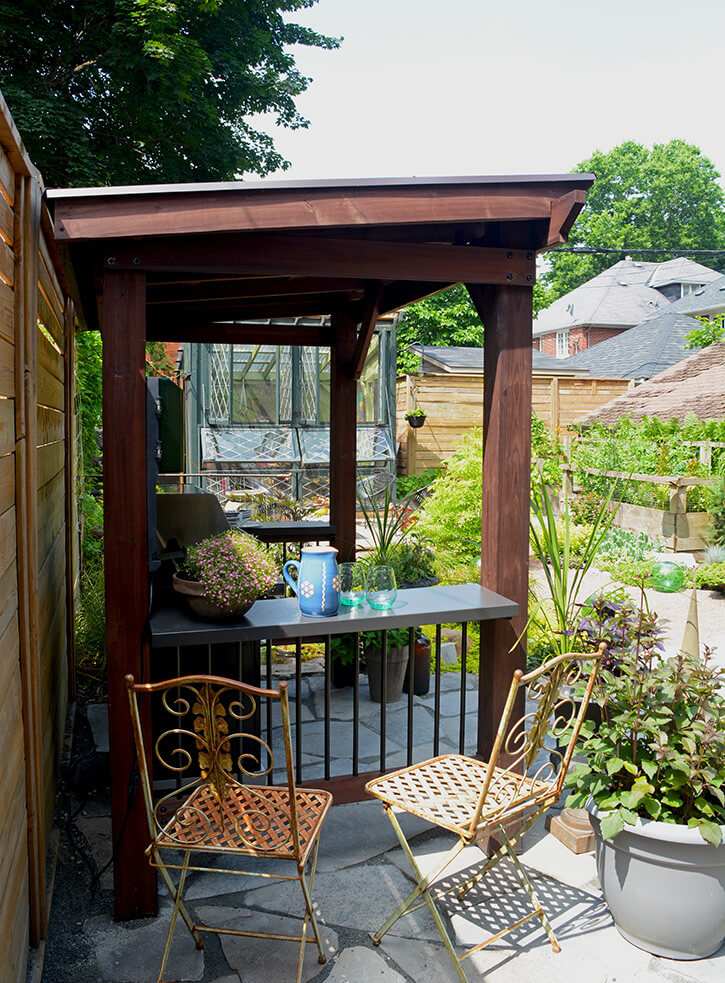
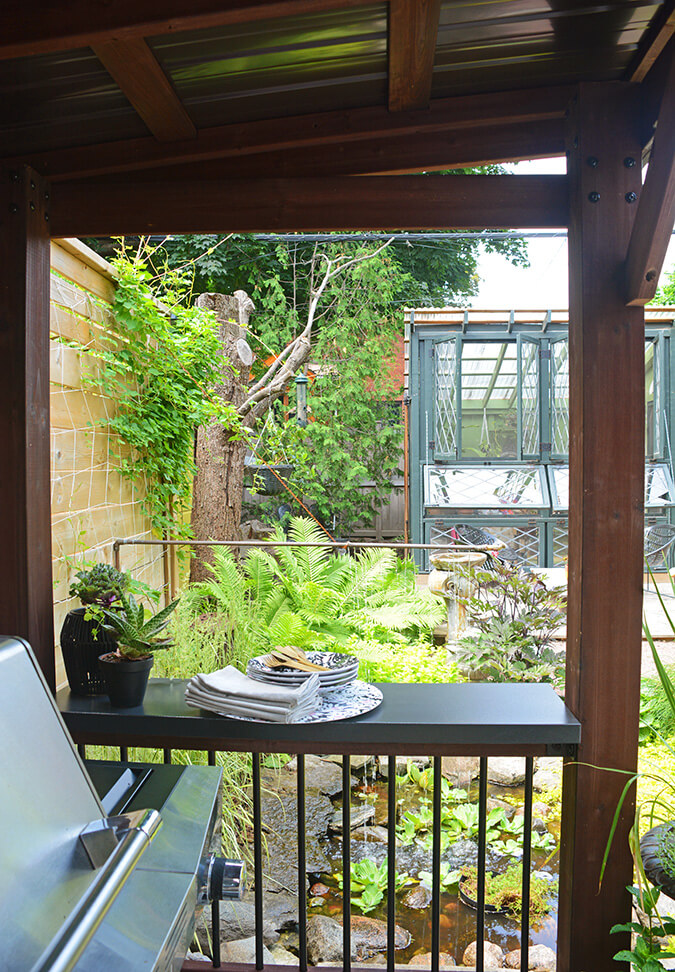
Then we added the side sections that included steel balusters and powder coated steel countertops (LOVE this extra space for serving and prepping food and hanging out and enjoying a drink – it’s almost like a little bar!):
Then we tackled the roof. My husband built the frame while I peeled off the very-stuck-on coating on the steel roof panels.
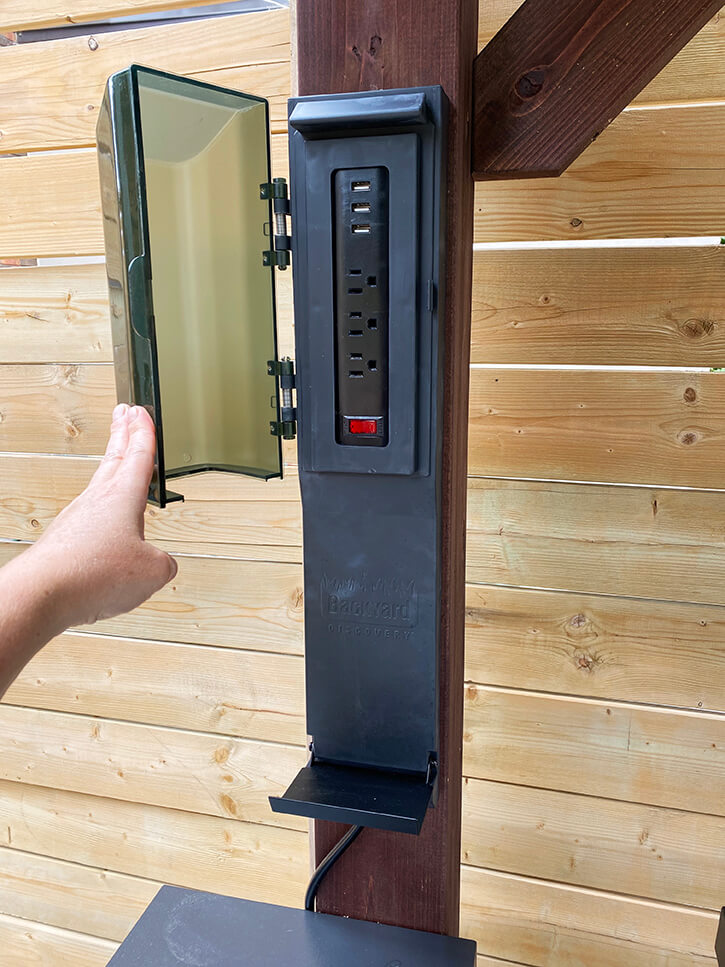
Husband was super excited that this grill gazebo came with the ability to have power, so he happily installed the PowerPort™ onto the back left post that features 3 electrical outlets and 3 USB ports, allowing him to install lights on the roof, a fan, charge his phone while grilling and plugging in one of his handmade bluetooth speakers (we always have one outside with us).
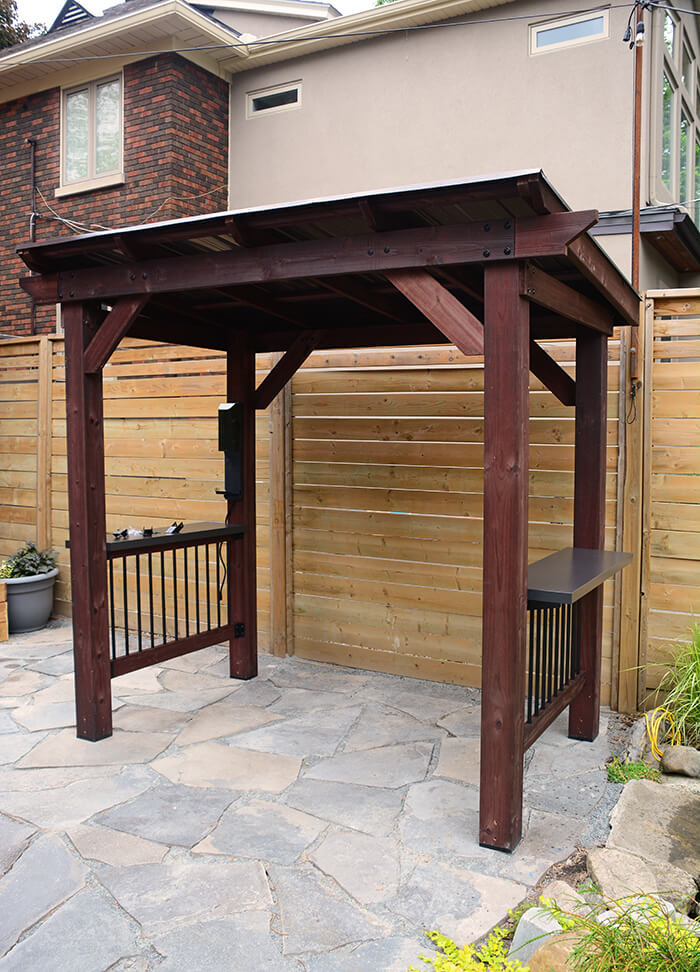
And there you have it, all done! We were sooooo happy with how this grill gazebo turned out. My husband stared out the back door for days in awe. We have a little bit of work still to do around that area but with some potted plants around the new gazebo, it really is looking fabulous already and we have been barbequing non-stop since we put it together. Before I share some photos of it looking cute and ready for some grilling, the kind folks @ Backyard Discovery are offering 15% off with the code DESIRETOINSPIRE15 on the Canadian site valid until July 15th. I could not recommend their products more – this was such a blessing and we honestly could not be more pleased with how it looks and functions.
Leave a Comment


Suzanne Melton says:
Looks fabulous! And, just in time for Canada Day!
KiM says:
Yes just in time for the party we never throw 😂 But the burgers we slapped on there were delish and Jeff was in his element under his fancy new gazebo
Cecilia says:
How did you anchor the posts? We ordered the metal XL but need to know if we need to prep for posts. It will be on paver patio that has pavers set in stamped sand
KiM says:
We didn’t anchor the posts. This thing weighs a fair amount so unless you’re worried a tornado is going to carry it away I wouldn’t worry about anchoring.
Conrad says:
How do you deal with rain and snow shedding off to the neighbors fence ?
KiM says:
I don’t know about snow yet we only just put it up. But we built that fence and didn’t get a dime from the neighbours so it will do what it does and they can deal with it 🙂 Plus there is a small gap so in theory everything should end up on our side.