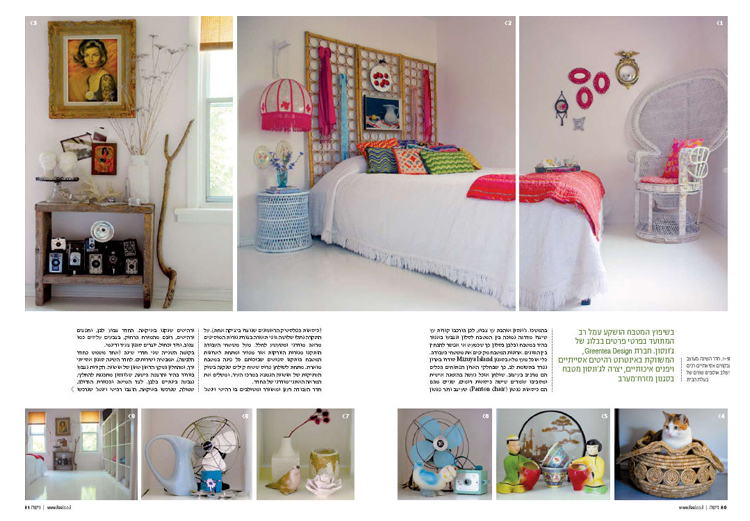
Displaying posts labeled "Kim’s House"
Some love from Israel
Posted on Tue, 19 Jan 2010 by KiM
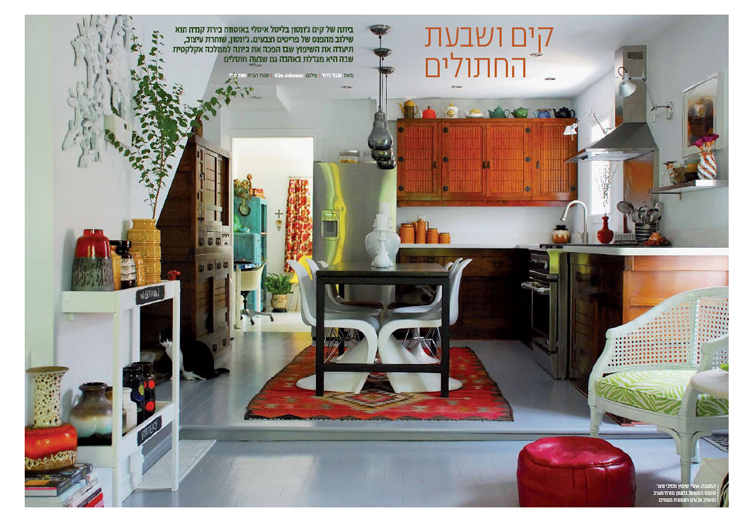
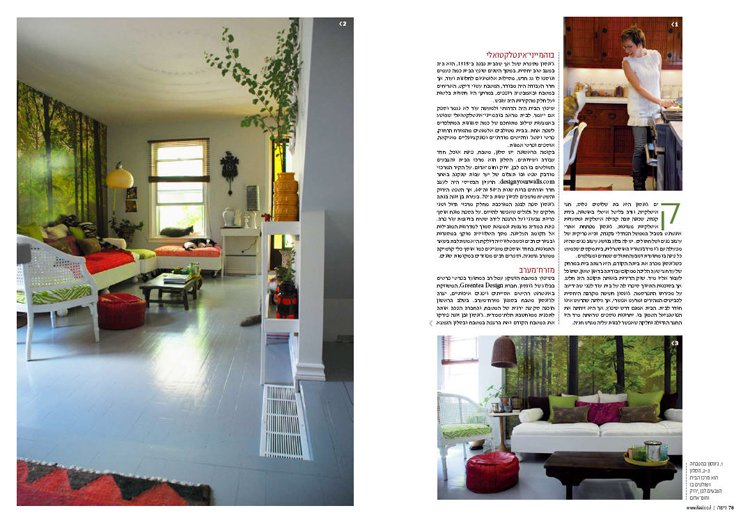
I found a little surprise in my mailbox this afternoon when I got home from work and I am happy to now be able to share it with you all. My home is featured in the latest issue of Nisha, an interior design magazine from Israel. Of course, I can’t read it but I’m sure it’s a great read (LOL) and it’s filled with so many of my photos which is cool considering I am an aspiring photographer (who should really take a course or 3). They sent me a PDF copy a while back which I’ll share instead of attempting to scan the actual article. A huge thanks to Shira for including me in this issue. It’s such a great feeling (and kind of shocking to be honest) to know that people around the world appreciate the work I’ve put into my little Ottawa pad.
Kim’s comfy couch
Posted on Wed, 25 Mar 2009 by KiM
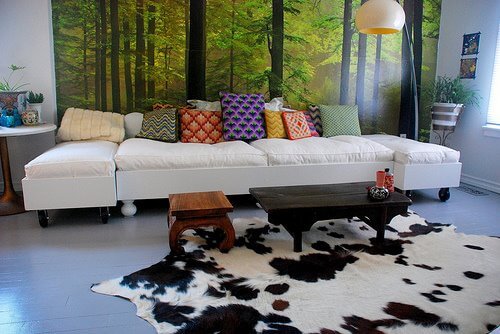
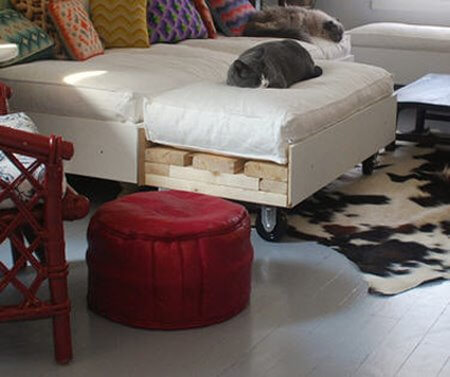
So I finally got around to getting the instructions for my DIY sofa from my boyfriend and he took a few photos to illustrate some key points. Sorry for the delay folks but I have a terrible memory and have been super busy lately. These are in his words, including the title (which I don’t want to take credit for LOL). (Thanks Jeff!!)

First thing is to measure the cushions you are going to use (we used the Ikea’s Lillberg sofabed cushions). You want the cushions to fit tightly into the sofa. This will keep the cushions fluffy and in place as you get comfy. The pillows should sit 2-3” below your sides depending on the height of your pillows. You can see the difference in this picture:
The frame is made from 2×4’s, the width ones that attach to the legs are first and then 2×4 lengths lay on top around the edges.
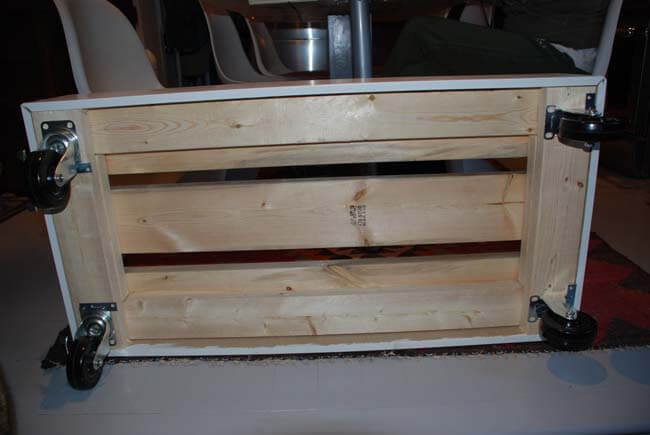
Another 2×4 is cut to fill in the gap so the 2×6’s on top sit evenly.
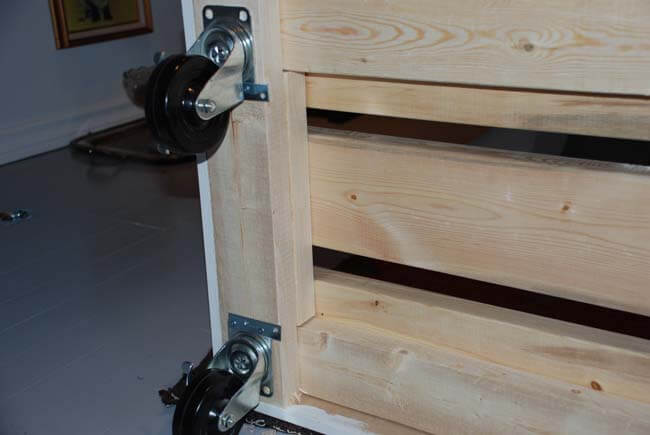
FYI – do not screw your wheels/legs to the couch like this. Use proper screws, something I forgot on the trip to Home Depot. And we’re going to switch out 2 of the casters on each of the 2 moveable pieces to finials, because despite using lockable casters, they still move around too much.
Lay some 2×6’s lengthwise on top. You could use whatever width of wood you want, heavy is good so the couch won’t move around when you are. You can see in the first photo an end view without the MDF.

The ledge on the back was made by raising a 2×6 so it would make a space for pillows. If you are going to make a pillow ledge remember to take that into account when making the frame (it was an afterthought on this one).
The sides are finished with the MDF and cut at 45 degree angle at the corners.
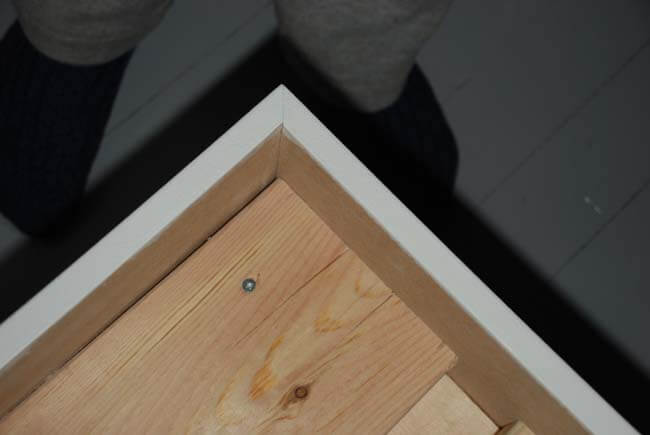
The MDF we used (8″) is the perfect height to reach from the top of the legs to 2-3” above the frame. The couch sits 12” high to the top of the MDF.
Fill the holes and cracks, prime (we bought pre-primed MDF), paint and accessorize as required (mine still require new pillows – hoping to tackle that ASAP).

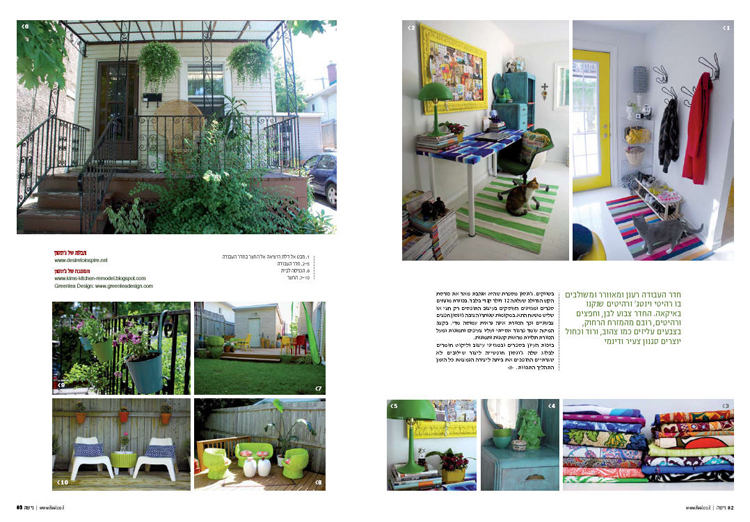
House tour on Apartment Therapy
Posted on Tue, 24 Mar 2009 by KiM
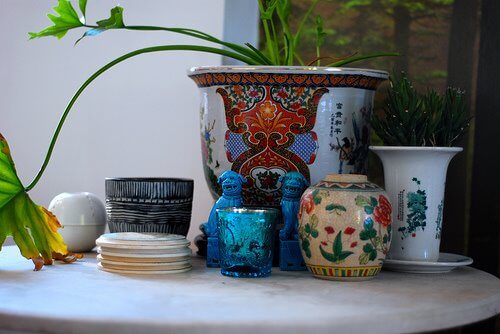
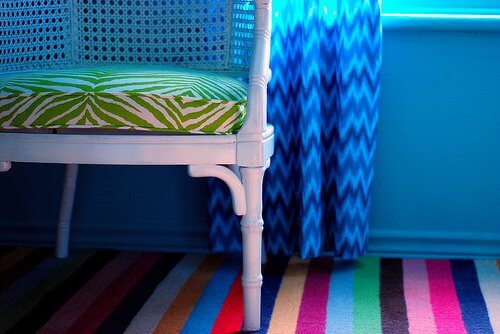
I’ve got big news! I have the honour of having my home featured on a house tour over at Apartment Therapy today. 🙂 Click here for the tour. I’ve been an avid follower of AT for quite some time, and have had some photos of my home(s) included in posts here and there but this is my first house tour. SO COOL. (I’m hoping their readers go easy on the comments as they can often get pretty foul). Here’s a sneak peak of some photos I took for them of nooks and crannies around my house (not sure if these will be included in the tour).

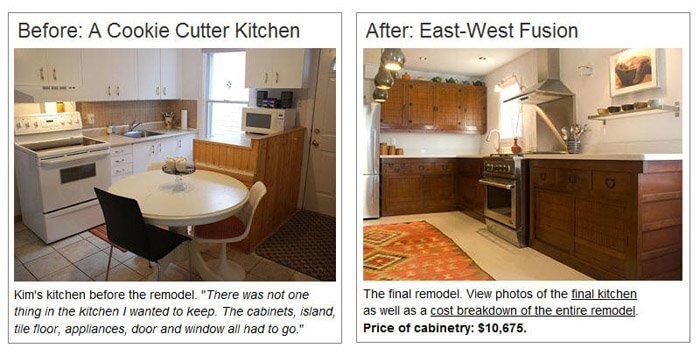
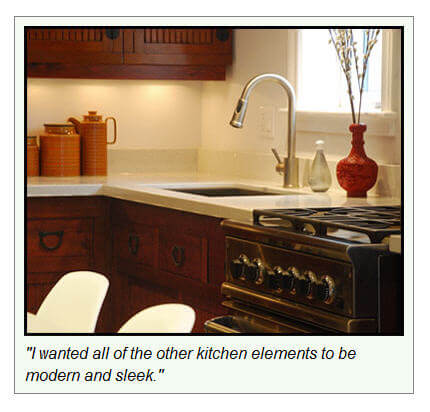
My dream kitchen
Posted on Tue, 17 Mar 2009 by KiM
This blog chronicles my entire kitchen renovation from start to finish. Greentea Design has provided me with their solid wood kitchen cabinets, and I’m taking care of the rest.
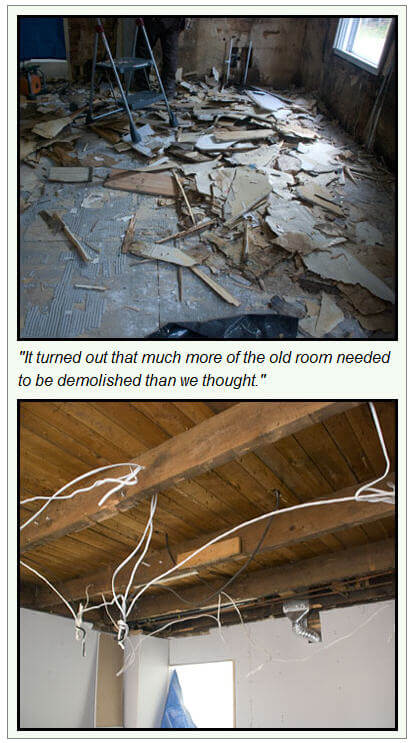
If you’d like to be brought up to date, check out my kitchen remodel blog for an archive of previous posts. I posted recently some before and after photos, and for this final post I’d like to share some photos I took for Greentea, the interview they have added to their website about my renovation, and a video tour of the kitchen.
My kitchen is complete, and I am ecstatic at the result. I can finally say that I have my dream kitchen. It is beyond my expectations, and every time I walk through my front door and see it, I can’t help but smile. I am never going to want to sell this house. I can’t imagine leaving this kitchen behind. I’d like to take this opportunity to again thank the folks at Greentea Design. They made this dream come true for me, and I am so grateful (and shocked) that they agreed to this partnership. It was alot of fun and hard work (on both our parts) and they were so patient and helpful throughout the whole process. I hope I can get in a trip to Toronto sometime soon so I can finally meet them and see their showroom. So thank you Greentea Design – you guys ROCK and I’m so proud to have a Greentea kitchen.
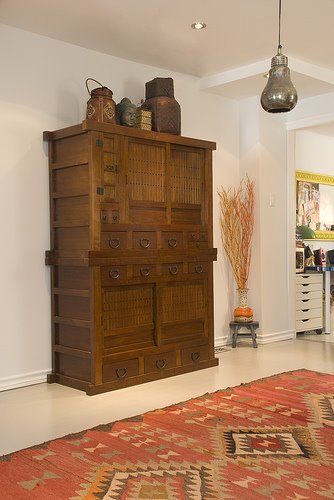
To start this post off, I wanted to invite you to check out the interview Greentea did with me that is now published on their website. They’ve divided it into 3 parts – Planning, Demolition and Installation, and the Finished Kitchen. What an honour to have my renovation featured on their main page. Here are some photos they’ve included in the interview.
I took some photos not too long ago for Greentea that really showcase the cabinetry so I thought I’d share some of them. (For the purpose of getting decent shots of the cabinets, the dining table and chairs were pushed into the living room).
For more final photos, and to see my video tour (complete with cat shenanigans), click HERE.
My sofa project
Posted on Sun, 1 Mar 2009 by KiM
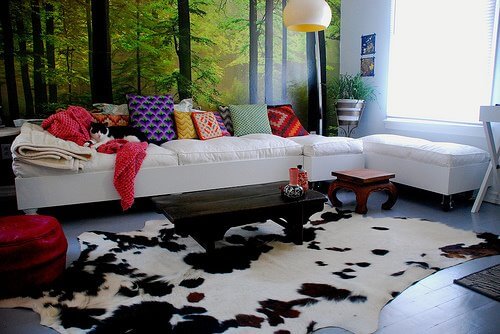
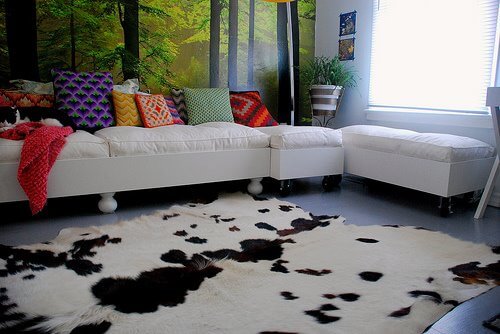
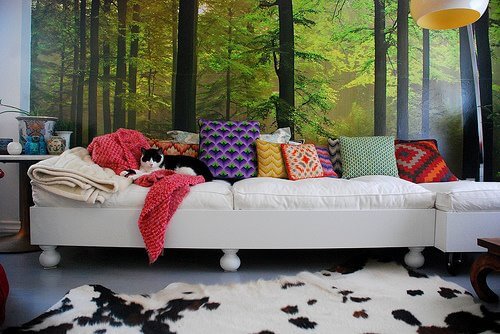
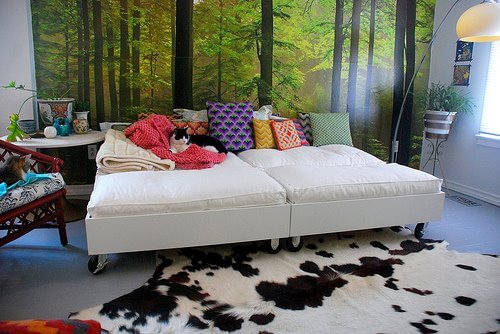
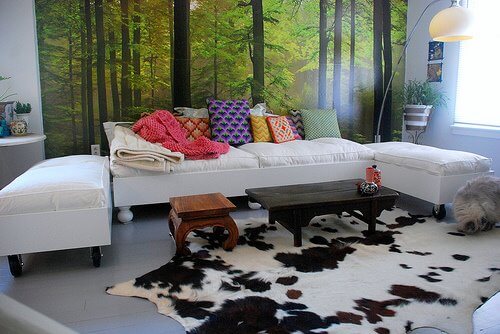
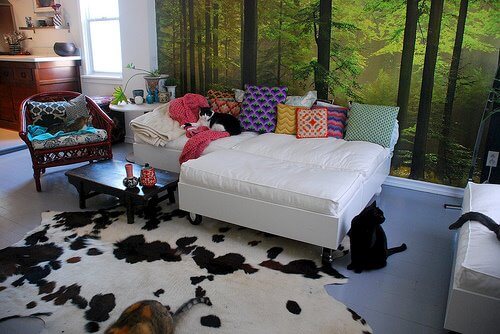
I decided a little while ago that my living room sofa was not working for me. It was cute, I’ll give it that. But it was NOT loungey. Definitively not wide enough for my boyfriend and I to sprawl on and watch movies. I’m hoping to find it a new home since I have no other room to put it in. I knew I’d never find a sofa that would suit my needs and my budget so my boyfriend and I built one. Since our carpentry skills are limited, I am quite surprised it turned out as well as it did. We finished building it a few days ago, and I painted it Friday.
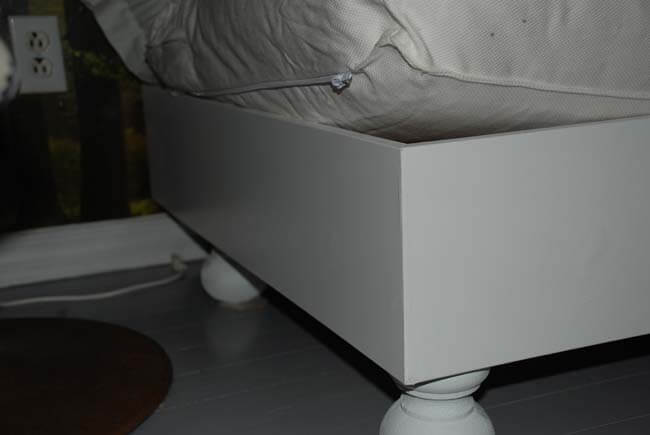
Since I wanted something low and loungey, I figured the easiest way to get what I wanted would be to get some cushions, and basically build boxes for them. Instead of buying foam for the cushions, I went to Ikea and bought cushions from one of their sofas where they were sold separately from the frame. There were 4 cushions – 2 for the base and 2 narrower ones for the back. So working with that we built one main base that houses the 2 larger cushions and an individual base for each of the narrower ones. This is the main base before I painted it.
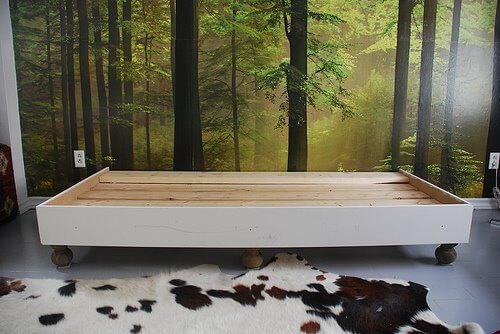
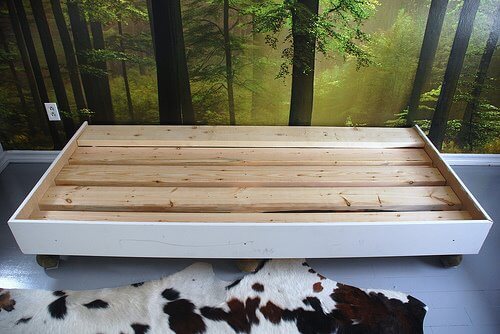

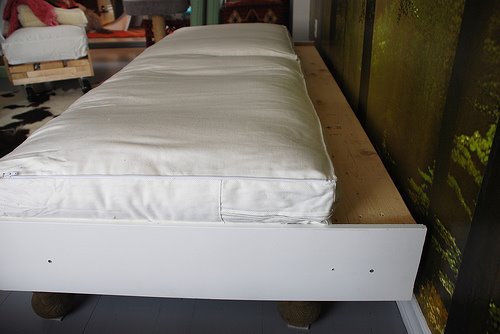
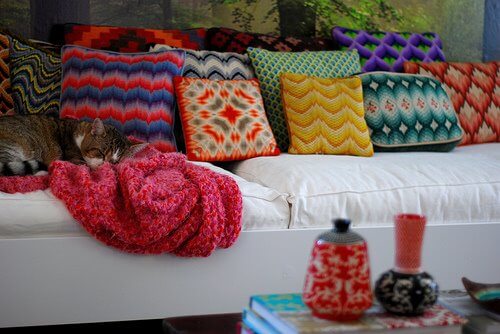
We used rounded fence post toppers (?) for the feet of the main section (I have pieces of furniture pads underneath them in the photos because it weighs a ton and I’m worried it’s going to dent the floor), and casters for the feet of the 2 smaller sections. This way the smaller pieces could be wheeled around the living room to accommodate different seating arrangements. Because I wanted a pile of pillows along the back of the main section and I was concerned they would take up too much space, we built a ledge along the back (which you can see in the third photo) to house the majority of the pillows, leaving ample room for sprawling.
I’ve had a couple of chances to try out the new sofa (I’m on it as I type this) and it’s incredible. It’s so versatile and ridiculously comfortable. I need to make new covers for the seat cushions. I bought the covers from Ikea for them but they are a thick canvas and cat hair sticks to it in an obscene way so I need something more cat friendly. I also just threw on a bunch of pillows for the photos below, but I need to buy fabric for new pillows as well. I’m thinking of sticking with neutrals, with lots of texture, and maybe a couple pillows in jewel toned colours to work with the rest of the living room and kitchen. I’m also considering stenciling the frames, but I have to give that more thought.
Here are some photos I took of the sofa with different placement of the smaller pieces.